Introduction
Planby PRO is a React based component for a quick implementation of schedules, timelines, EPG, live streaming, music events and many more ideas. It uses a custom virtual view which allows you to operate on a really big number of data. The component has a simple API that you can easily integrate with other third party UI libraries. The component theme is customized to the needs of the application design.
Getting Started
Get started by authenticate and instal Planby PRO package.
What you'll need
- Access to your Planby PRO portal
- Activate your Planby PRO license
- Add your team members to the Planby PRO portal
- Generate a personal access token
Options
There are three ways to install Planby PRO package
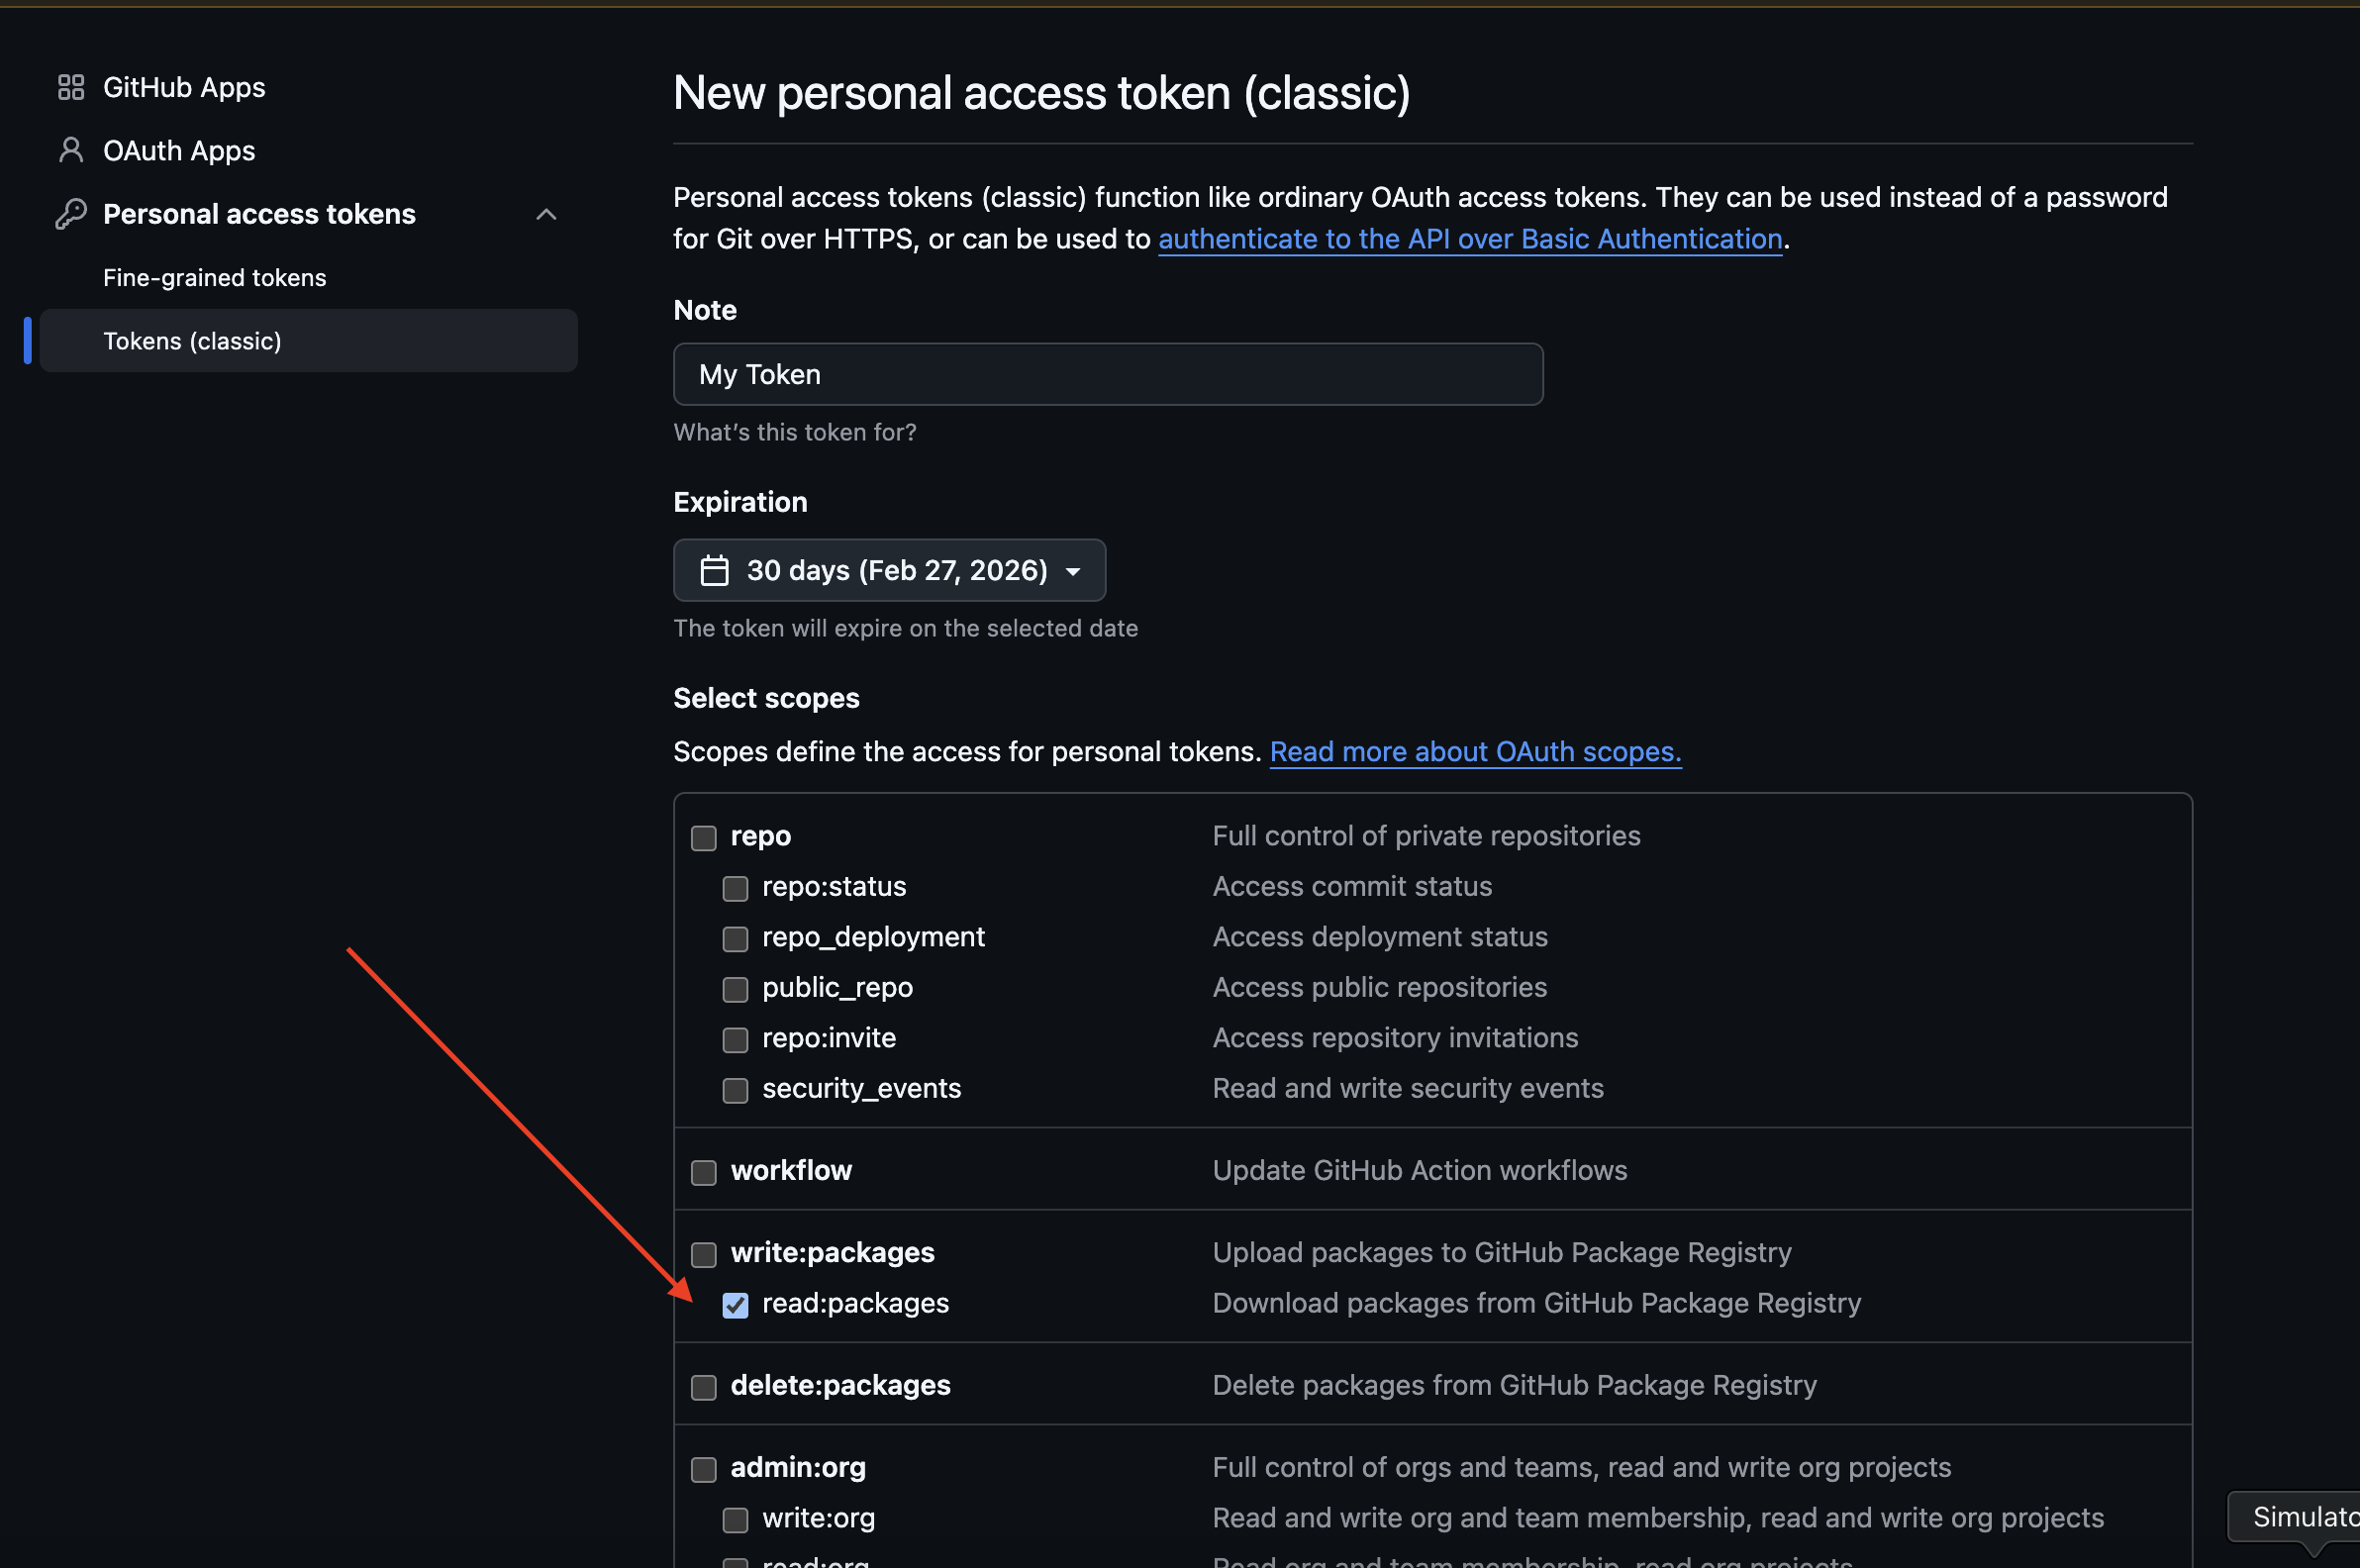
Get personal access token
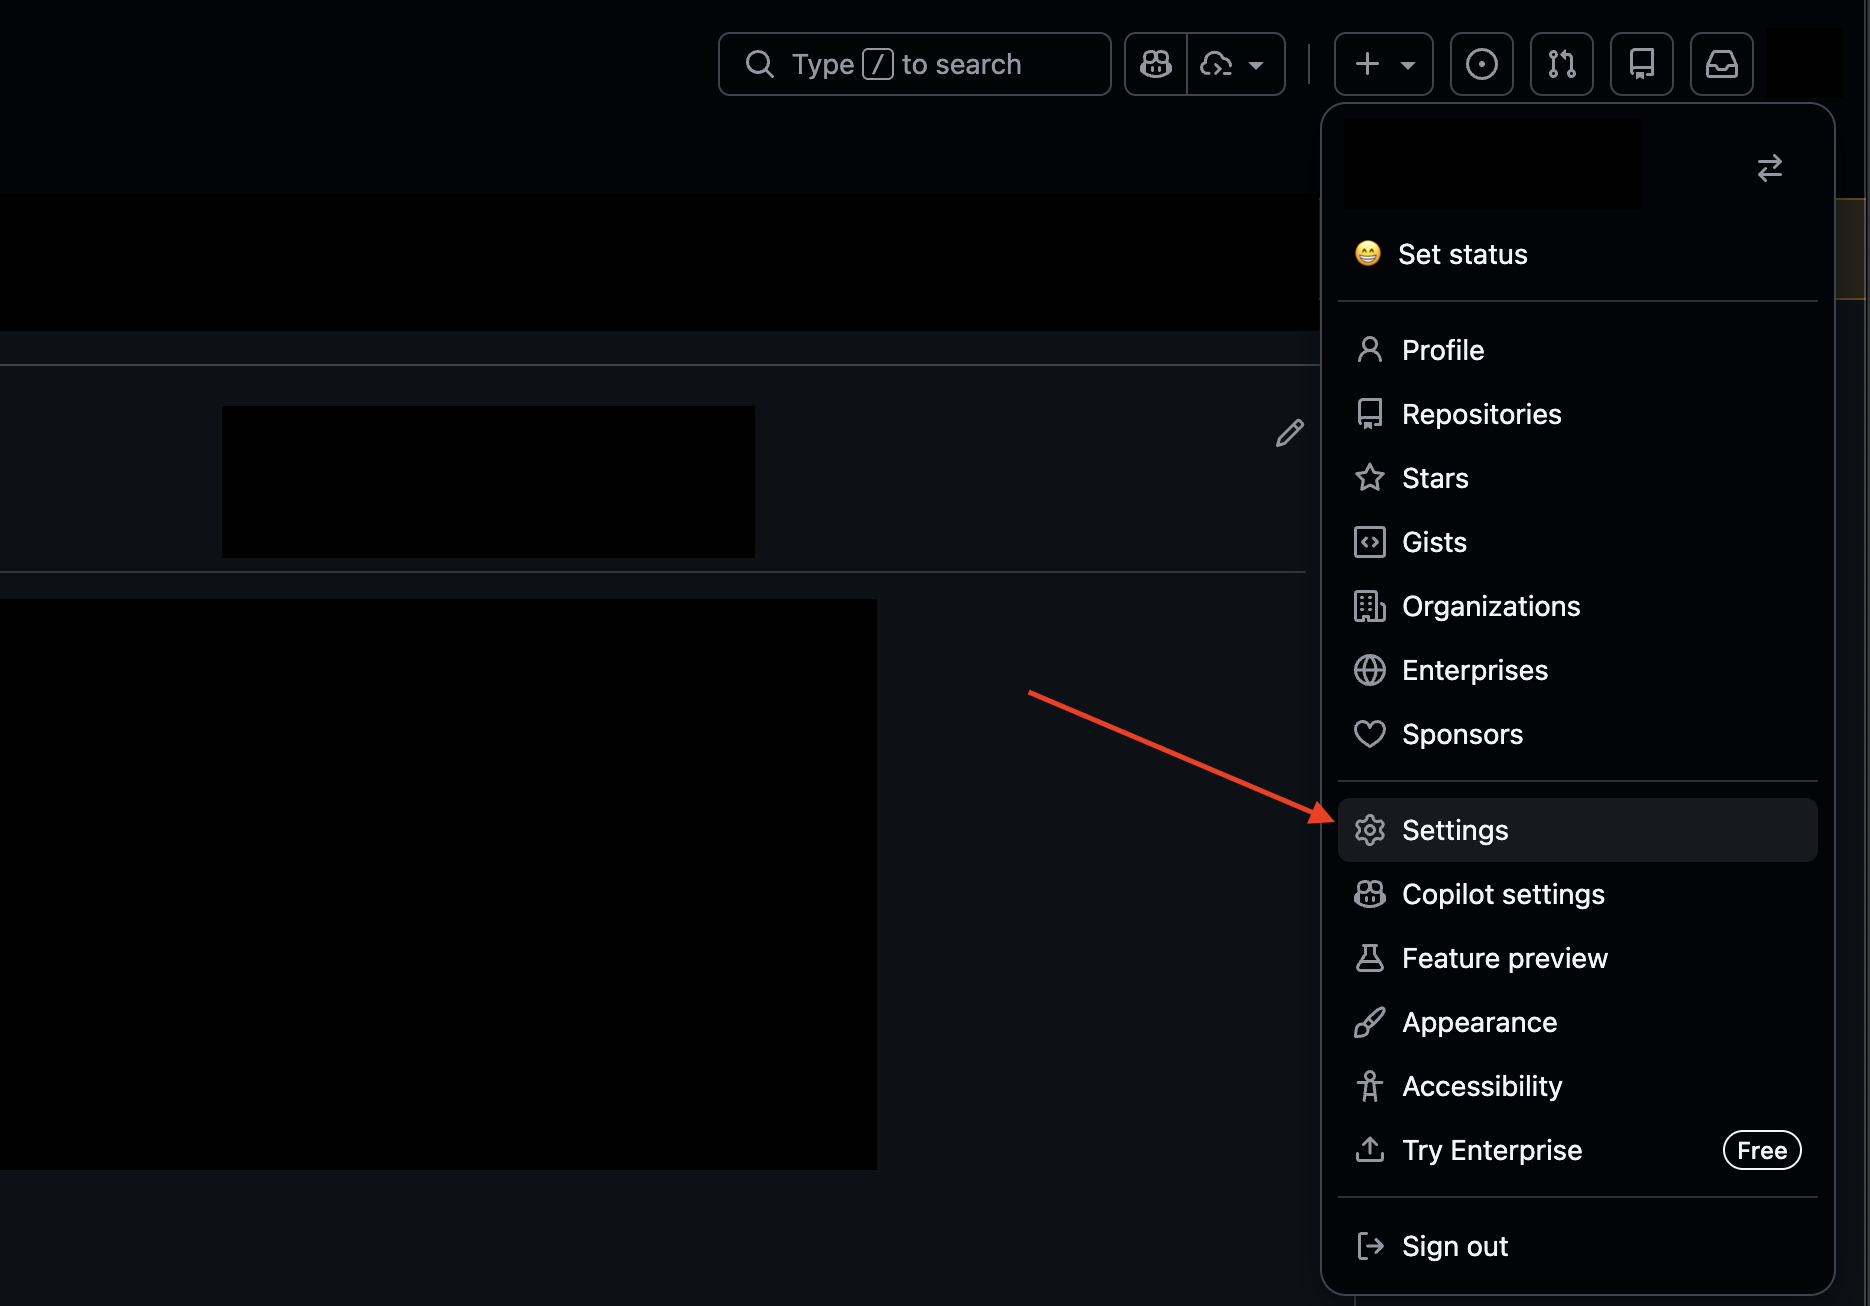
Please create the personal access token in the Github -> Developer Settings -> Personal Access Token -> Generate new token (classic) -> read:packages
1. Go to settings
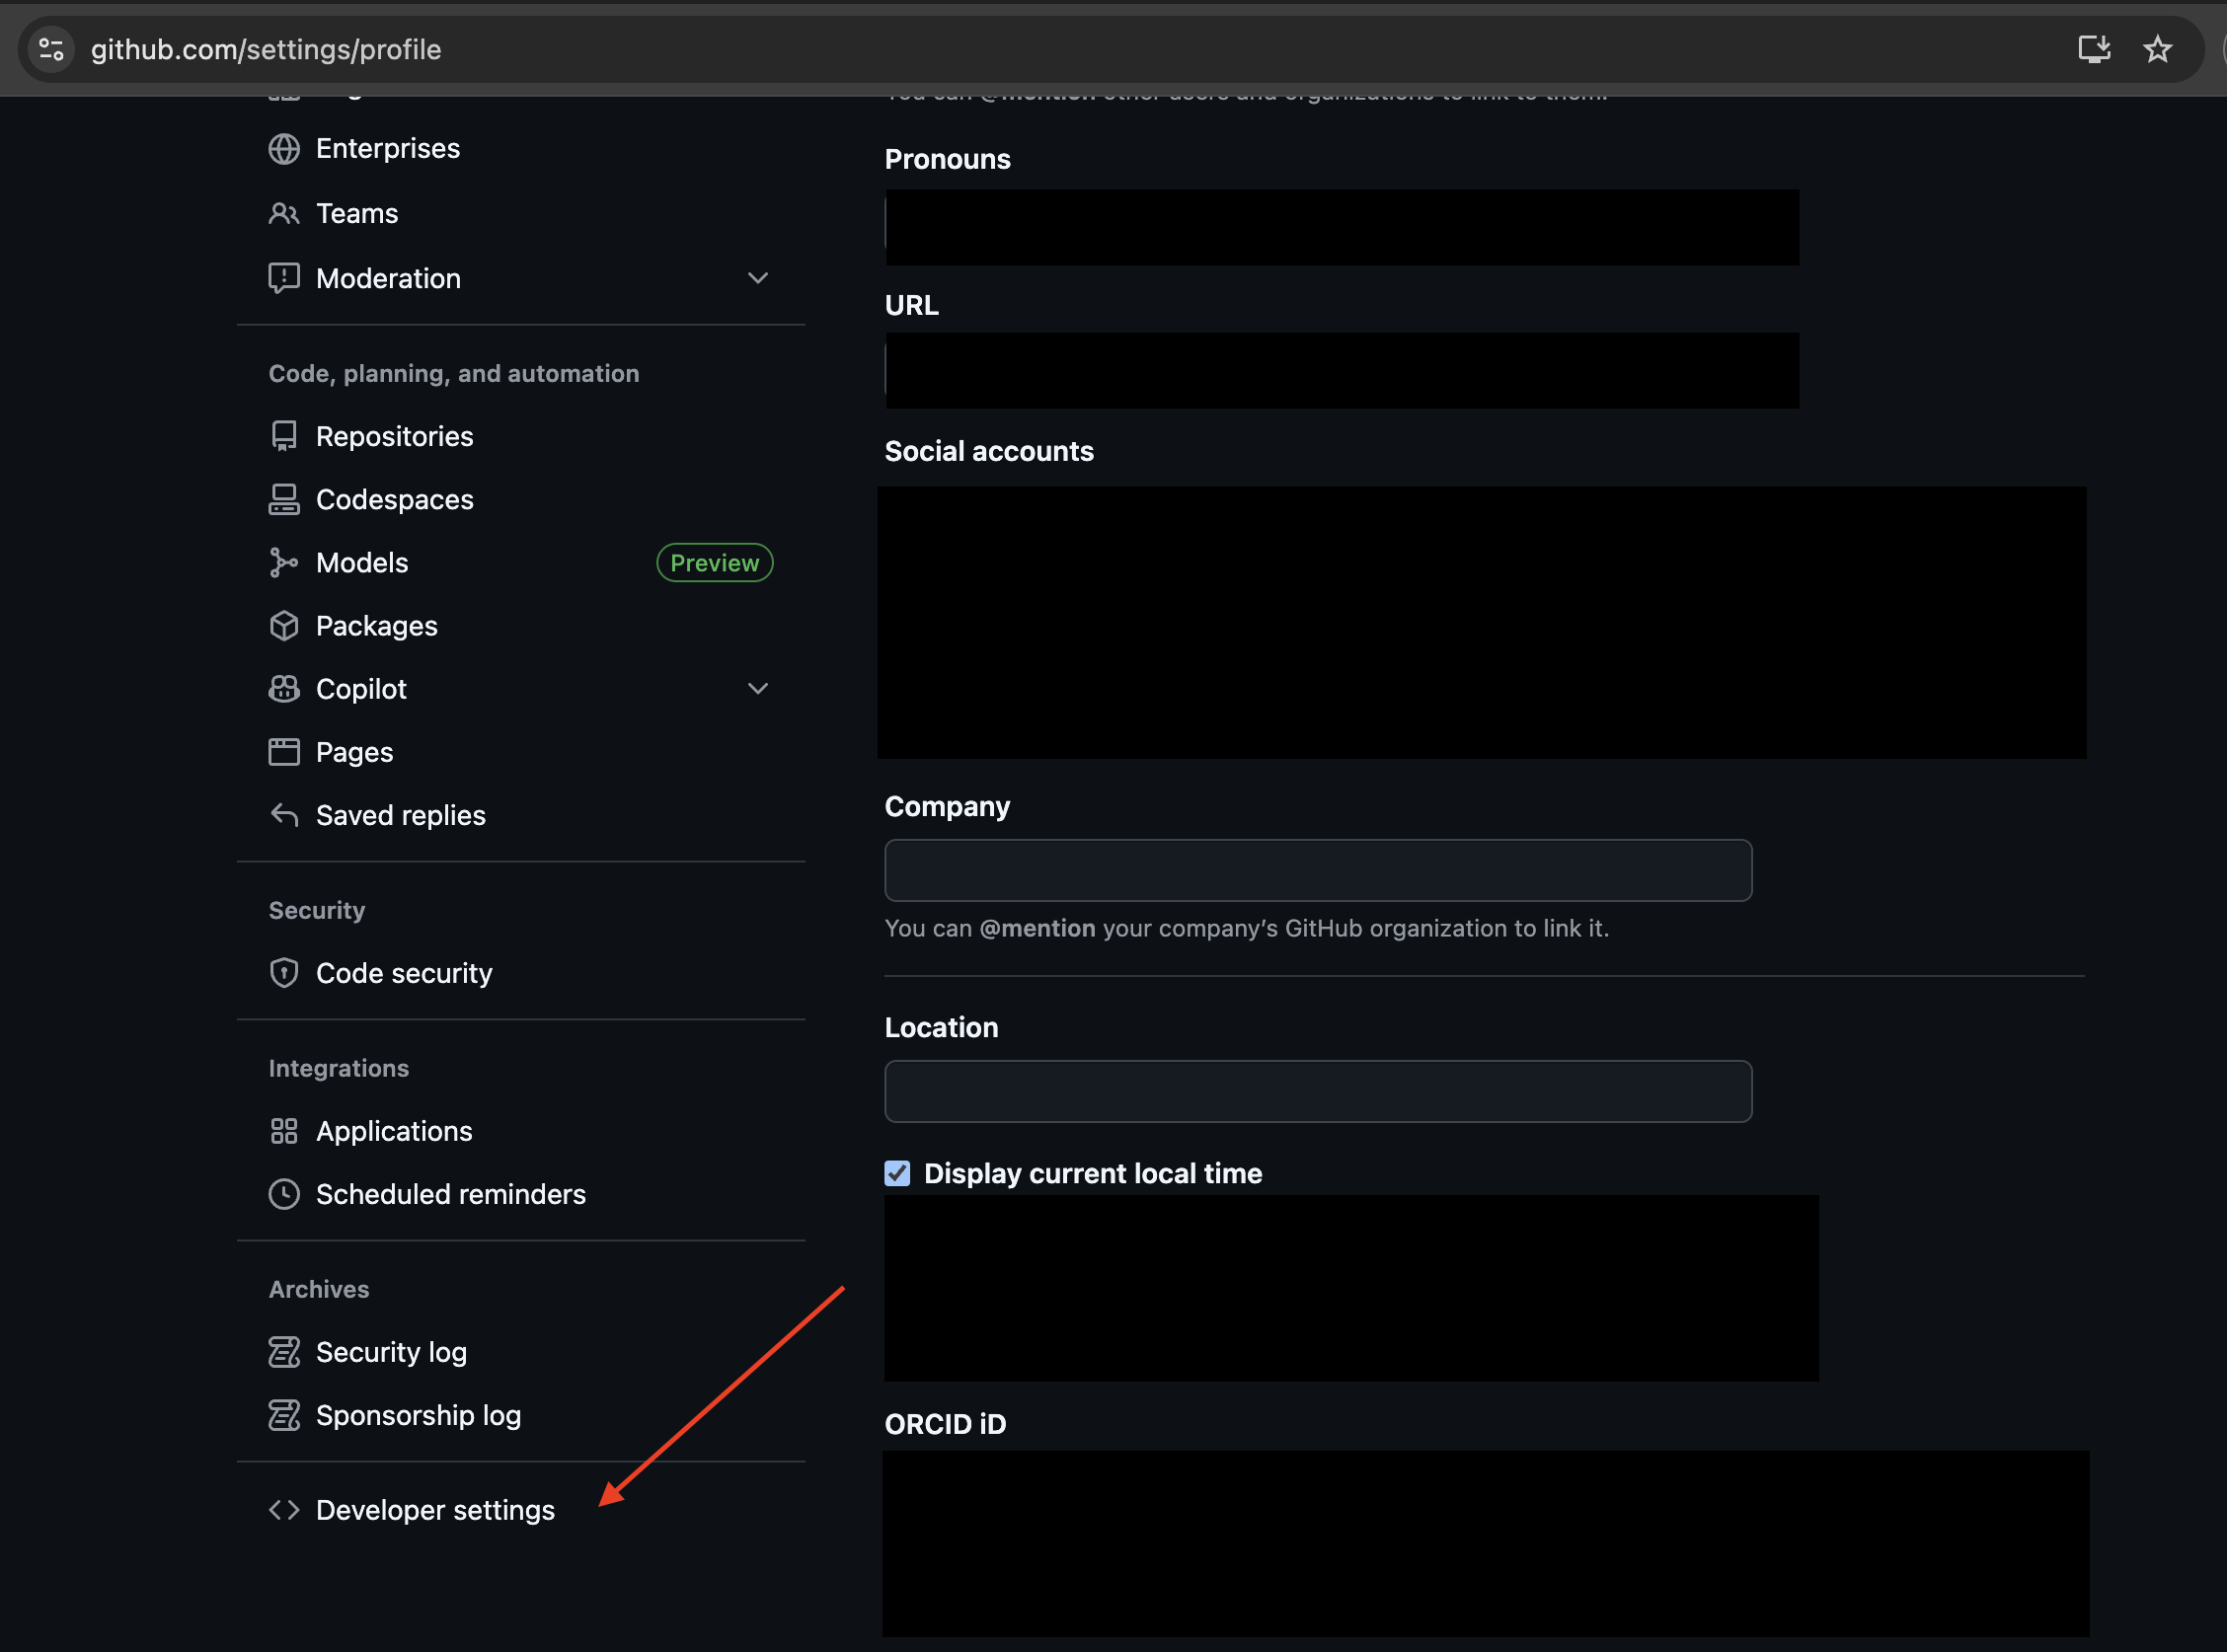
2. Go to Developers Settings
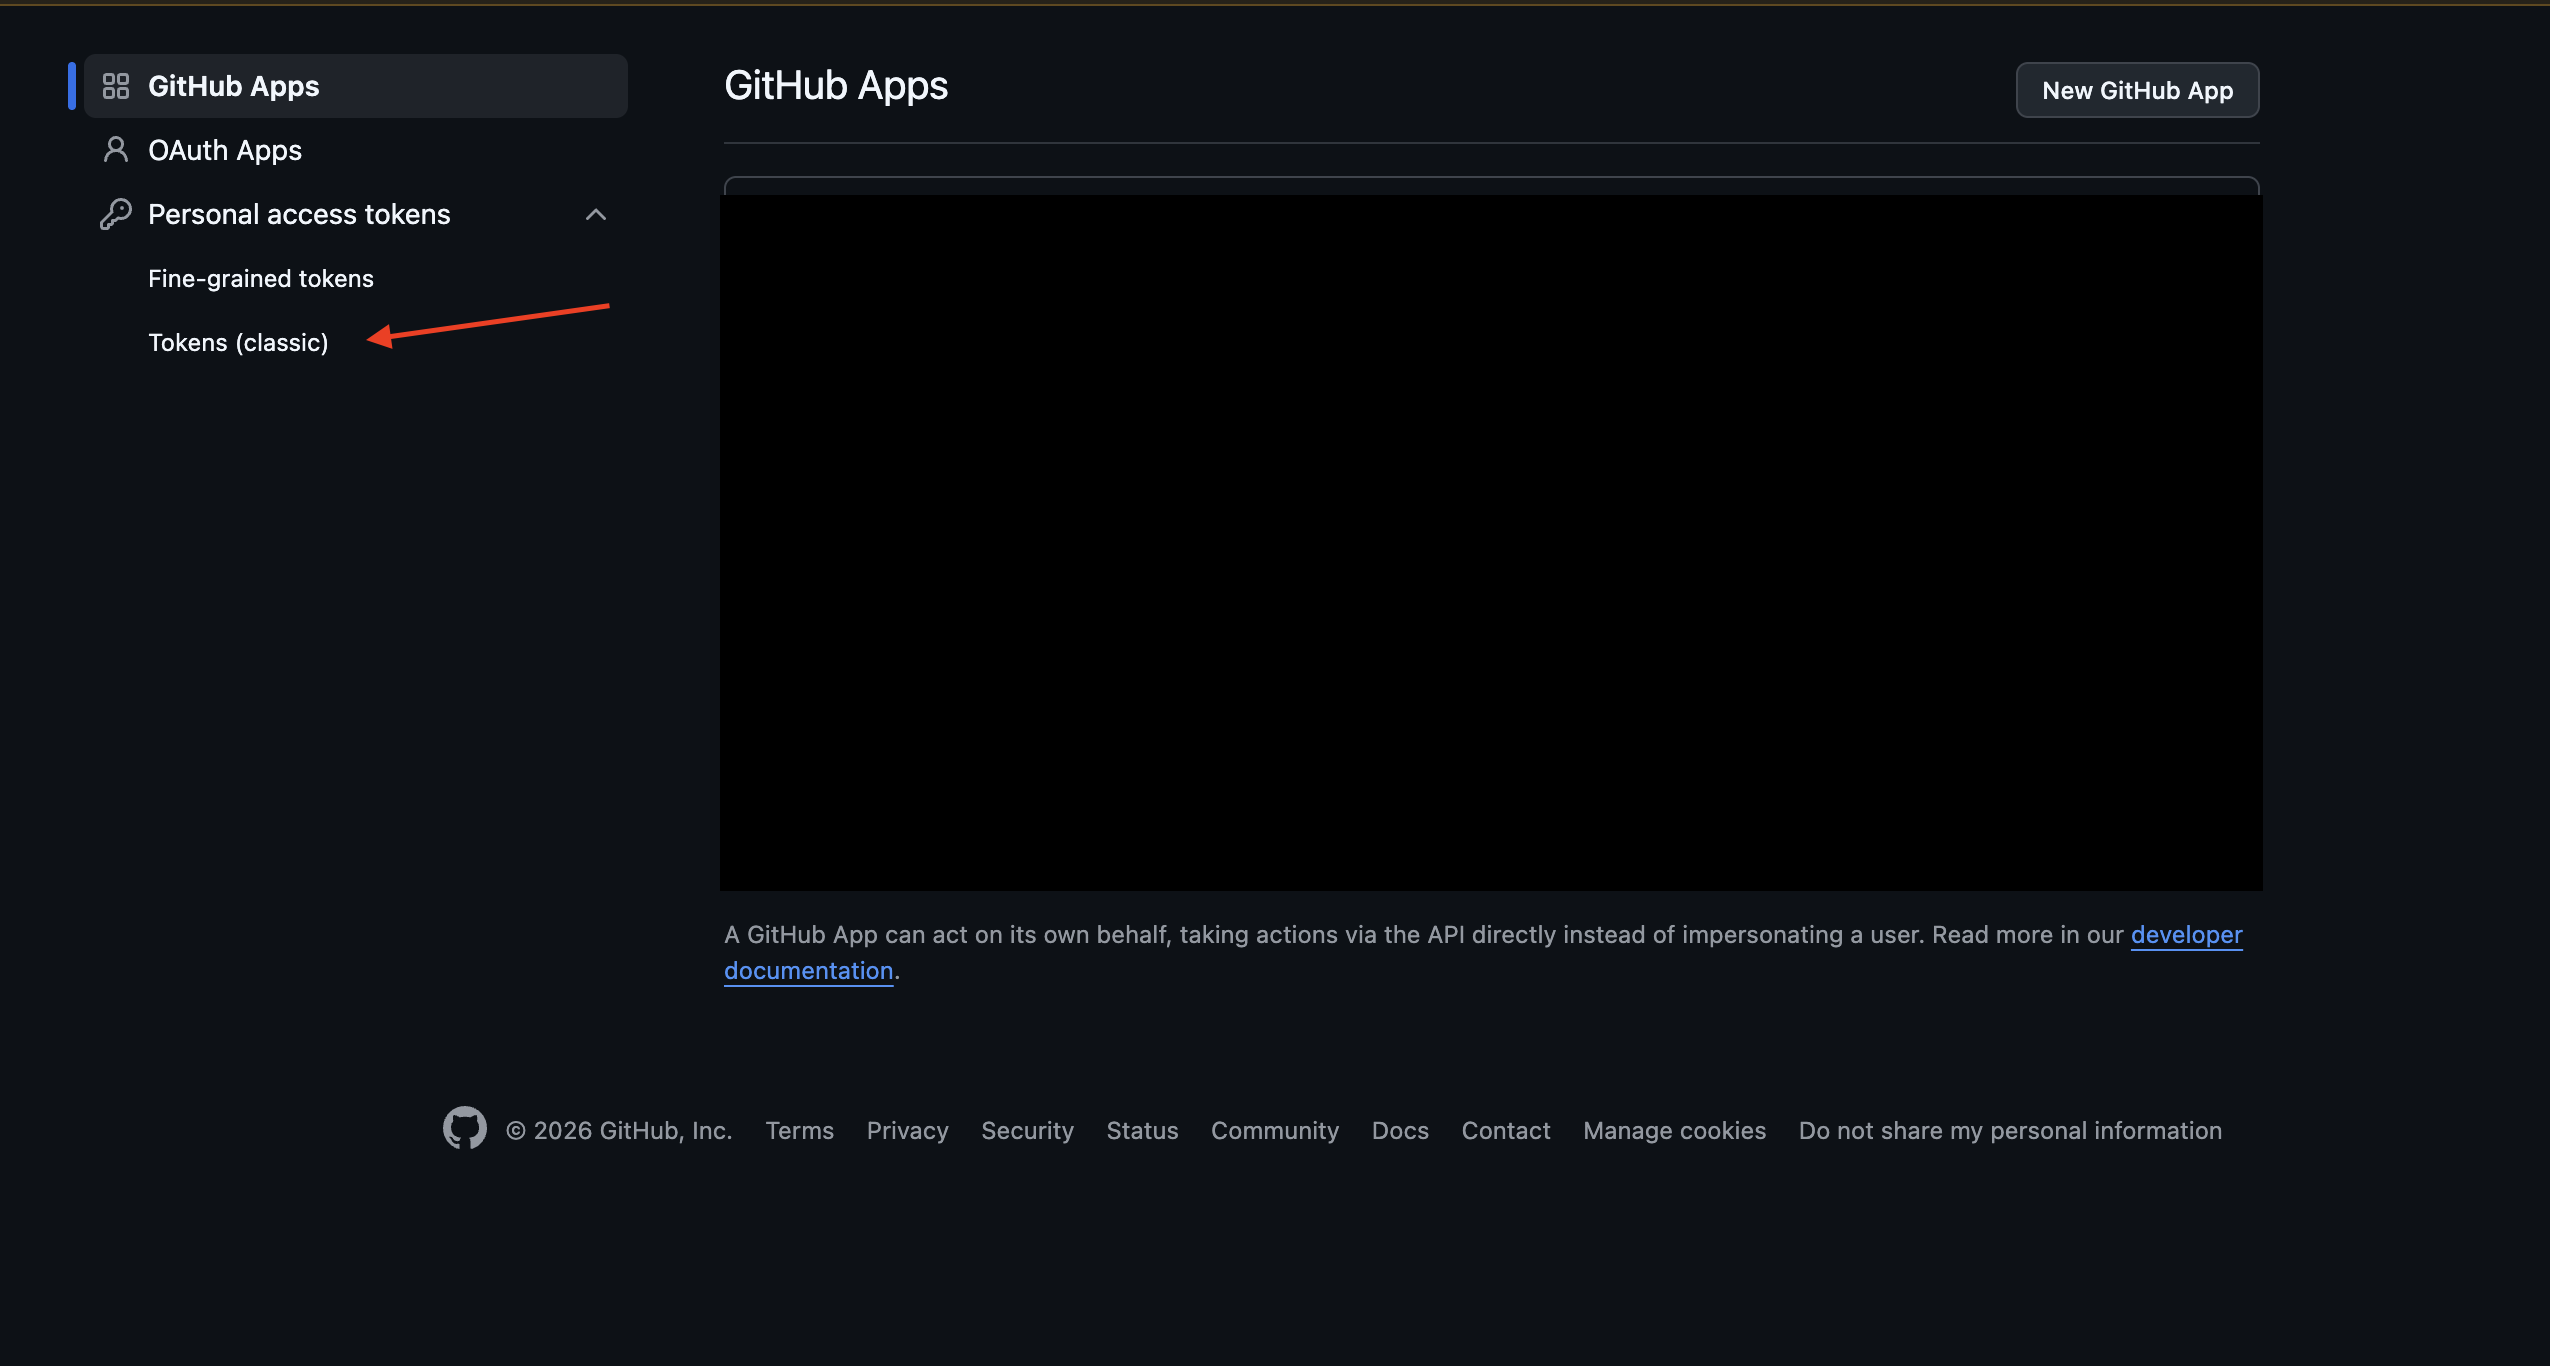
3. Click on Personal Access Token
4. Click on Generate new token (classic)
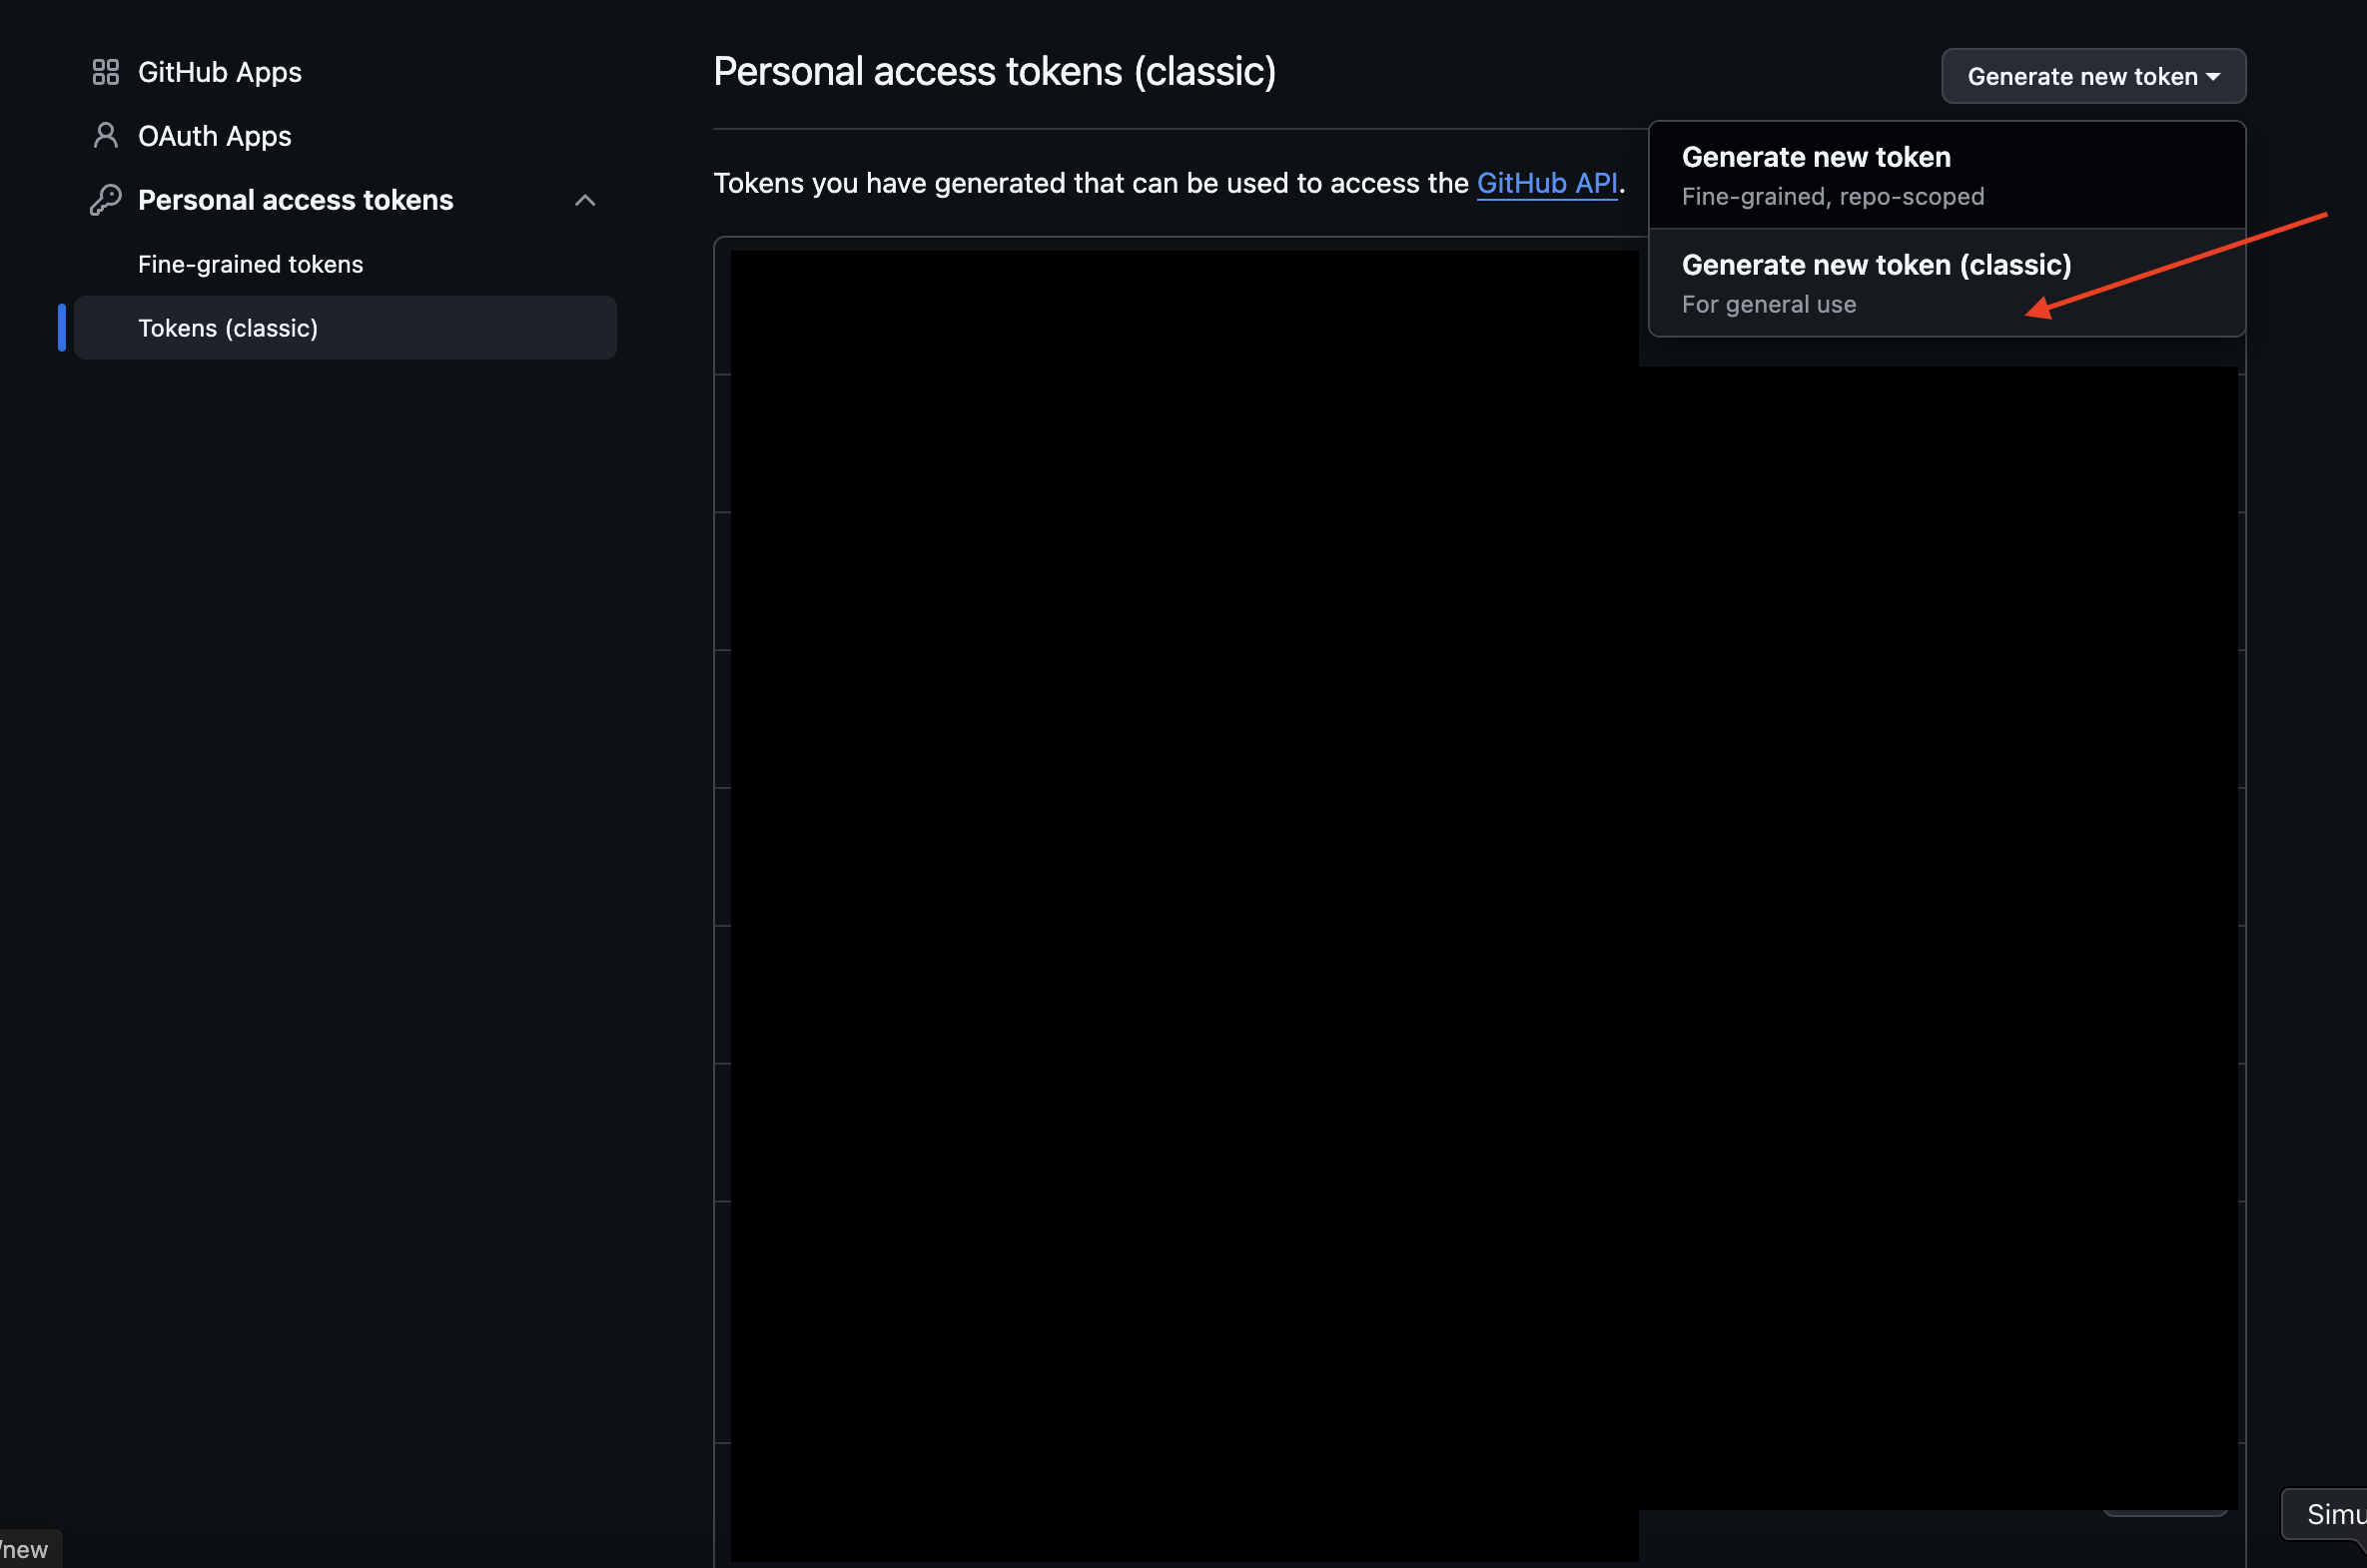
5. Click on read:packages and generate the token
Option 1: Install Planby PRO (Recommended)
In the same directory as your package.json file, create or edit an .npmrc file to include a line specifying GitHub Packages URL and your personal access token (classic) - read:packages
@nessprim:registry=https://npm.pkg.github.com
//npm.pkg.github.com/:_authToken=TOKEN
Option 2: Install Planby PRO
Login to npm registry with the Github account with your username and personal access token (classic) - read:packages.
npm login --registry=https://npm.pkg.github.com --scope=@nessprim
> Username: USERNAME
> Password: TOKEN
In the same directory as your package.json file, create or edit an .npmrc file to include a line specifying GitHub Packages URL
@nessprim:registry=https://npm.pkg.github.com
Option 3: Install Planby PRO
To your per-user authenticate by adding your personal access token (classic) to your ~/.npmrc file, edit the ~/.npmrc file for your project to include the following line, replacing TOKEN with your personal access token (classic) - read:packages.
//npm.pkg.github.com/:_authToken=TOKEN
In the same directory as your package.json file, create or edit an .npmrc file to include a line specifying GitHub Packages URL
@nessprim:registry=https://npm.pkg.github.com